| Pages:
1
2
3
4
5
..
10 |
Mike
Super Administrator
        
Posts: 1568
Registered: 12-3-2002
Location: California, USA
Member Is Offline
Mood: Happy
|
|
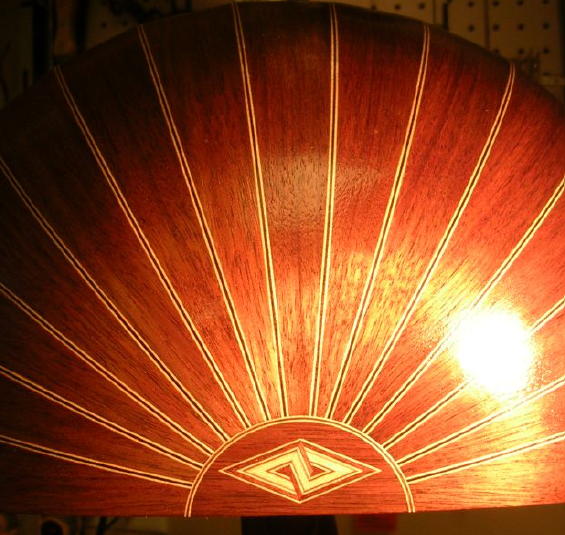
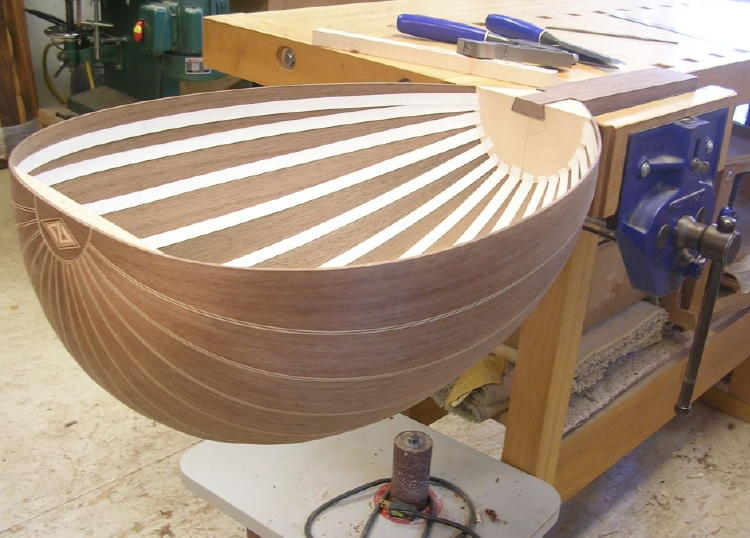
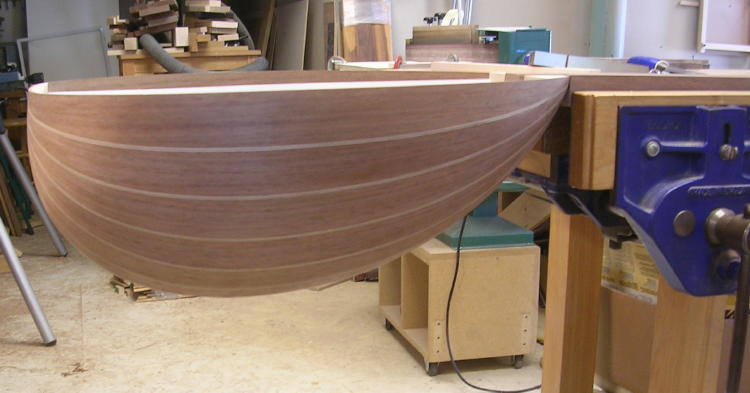
The bowl is pretty much complete at this point. The inlays are all scraped down and flush with the bowl. The tail piece inlay is complete as well.
Looks incredible. Unbelievable work!
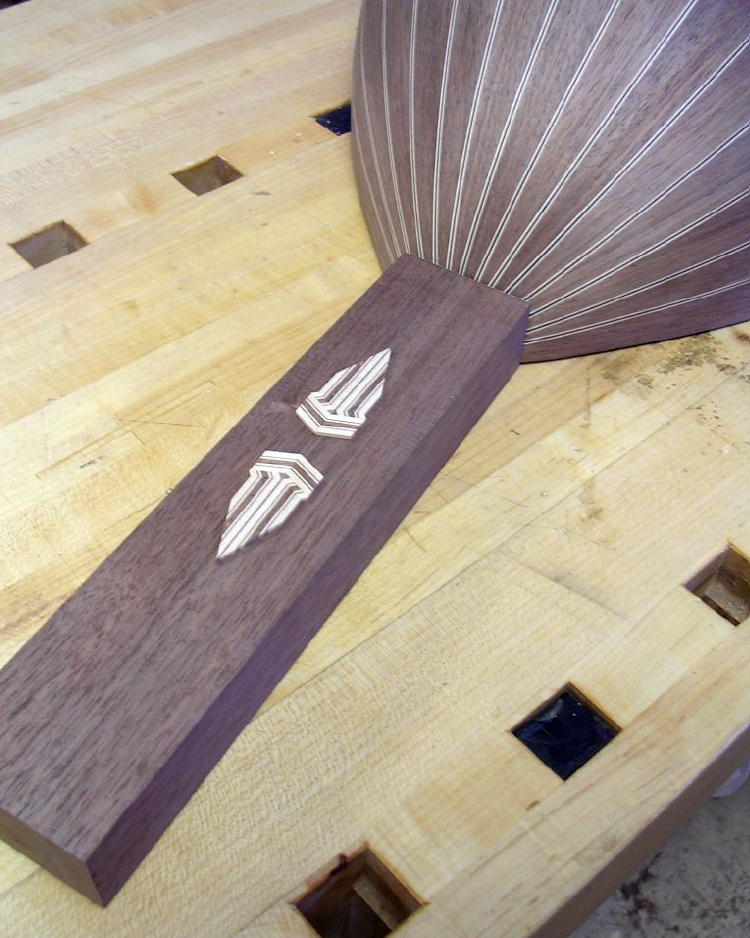
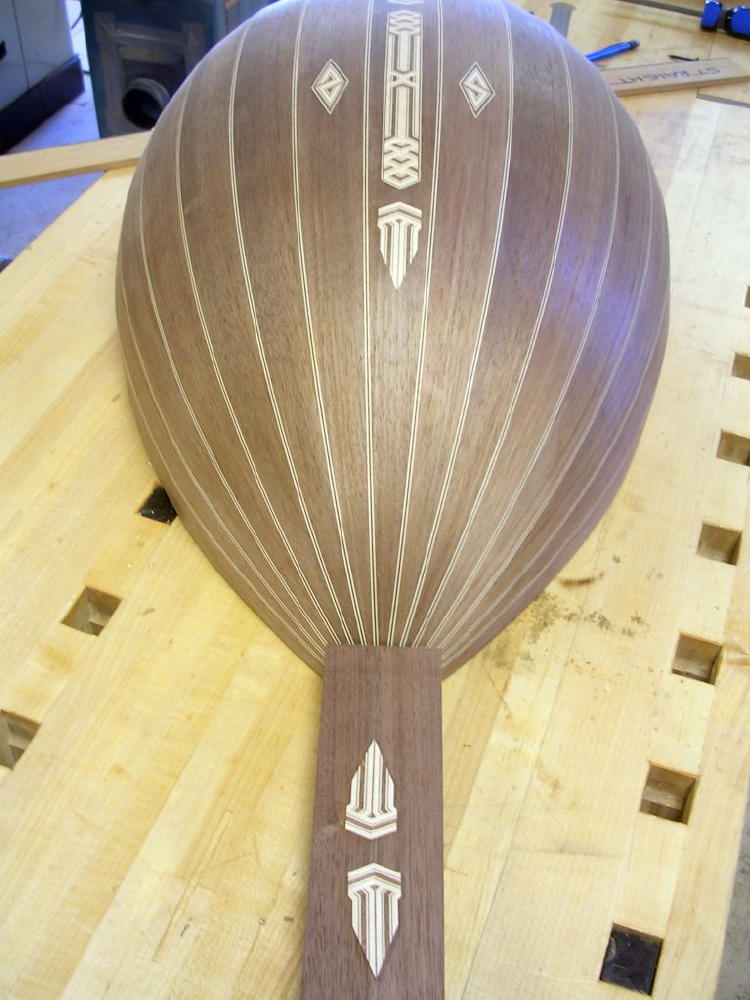
Here are some shots of the inlay on the bowl.

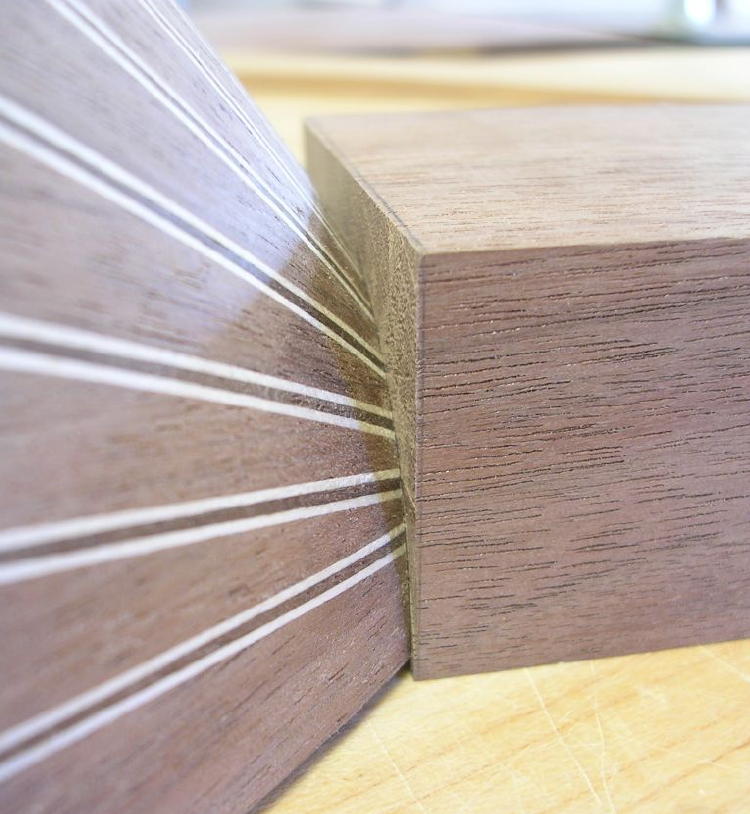
Here's a closeup shot of the parallelogram in the tail piece.
|
|
|
Cyberquills
Oud Junkie
    
Posts: 182
Registered: 10-12-2006
Location: Western Australia
Member Is Offline
Mood: resonant
|
|
Fantastic work Jameel 
CQ
|
|
|
oudplayer
Oud Junkie
    
Posts: 849
Registered: 5-9-2004
Location: new jersey/ Israel
Member Is Offline
Mood: ouds up
|
|
hey jameel
great work  
looks amazing i and i cant wait to see more .
keep rocking on
thx sammy
we are lost camels in the desert and wanna find our way to water and the water is in aden
|
|
|
Mike
Super Administrator
        
Posts: 1568
Registered: 12-3-2002
Location: California, USA
Member Is Offline
Mood: Happy
|
|
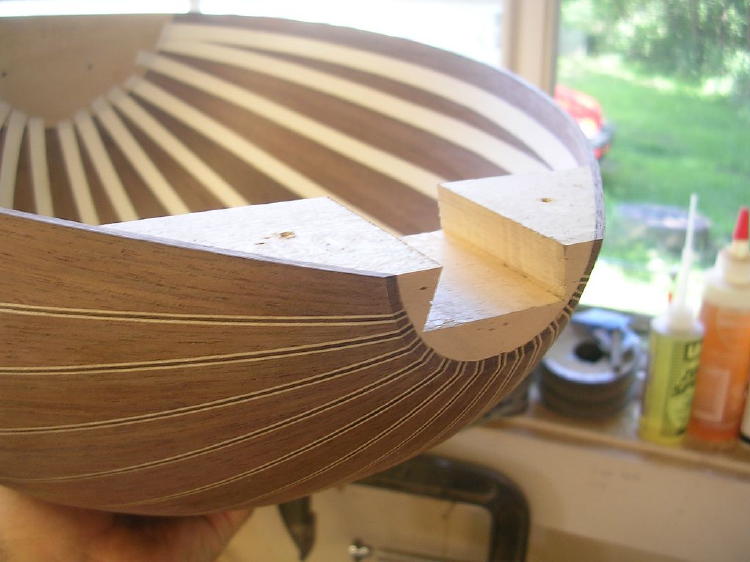
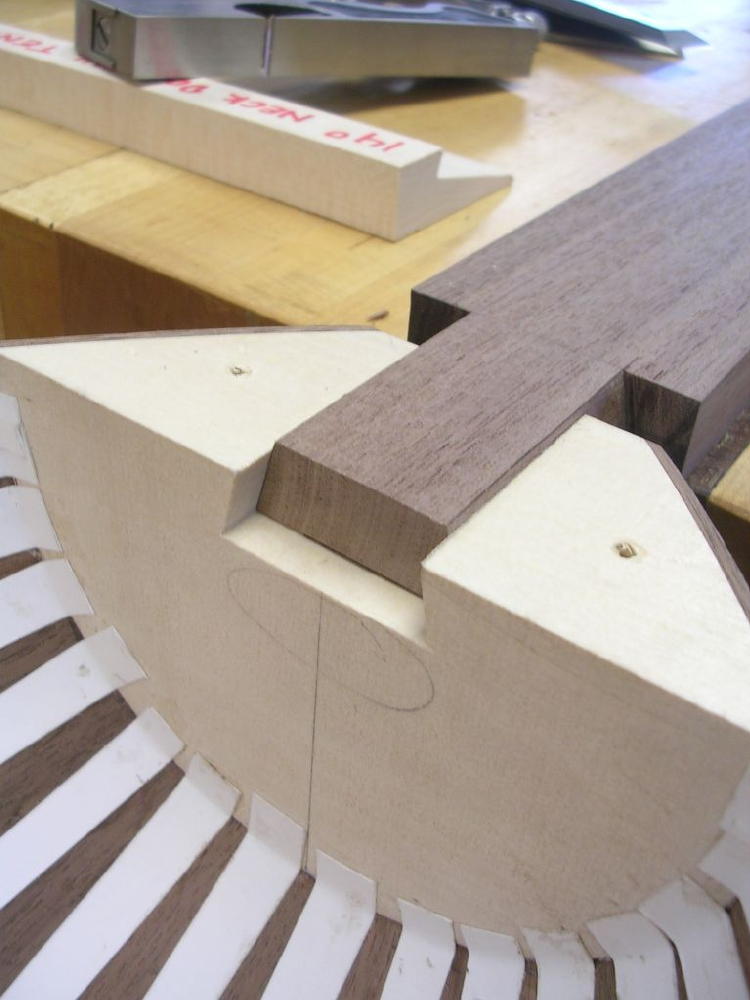
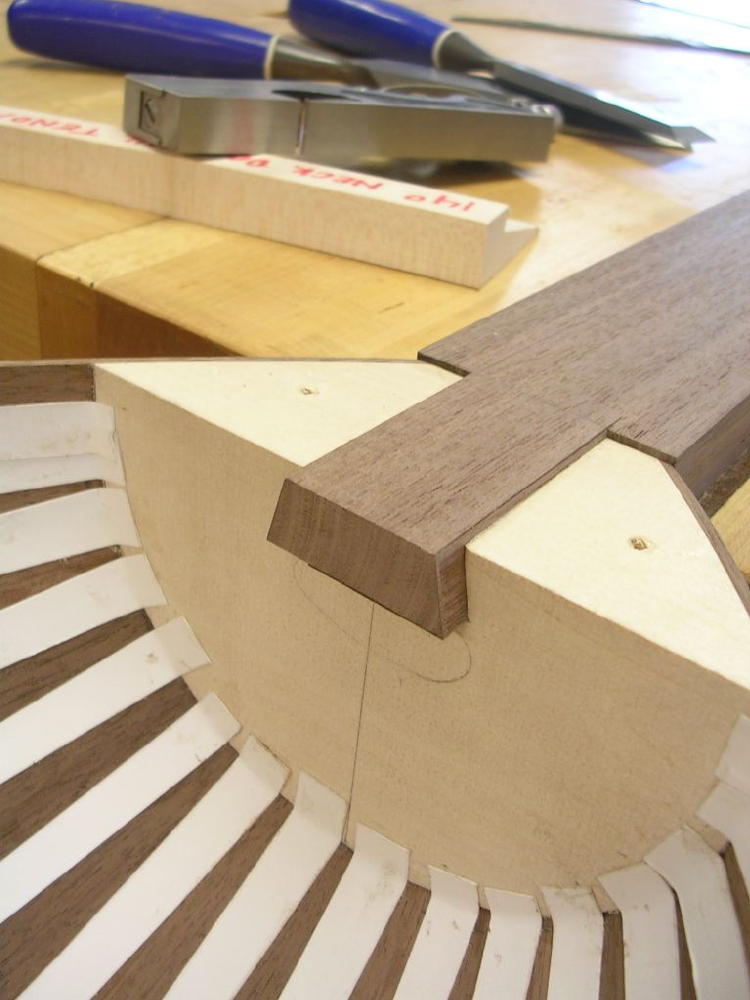
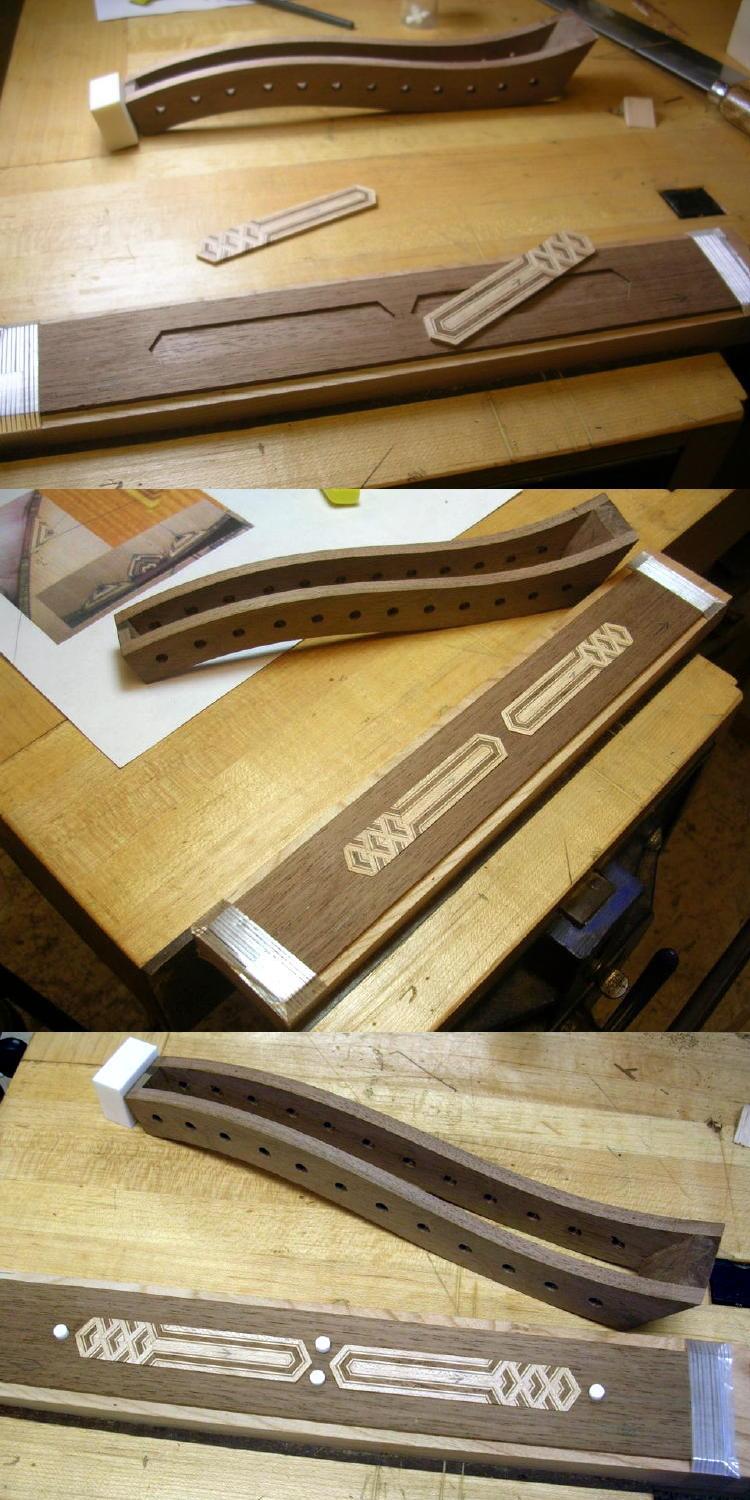
Starting on the Neck
Here are some shots of the neck being made. Not shaped yet, but very good progress.
This dovetail joint is going to be super strong. Much better than the old school dowel joint used in the past.
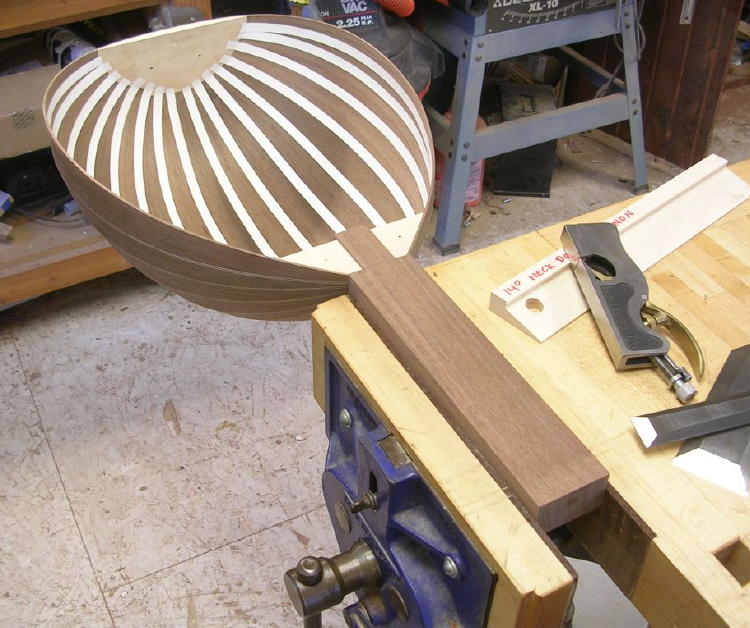
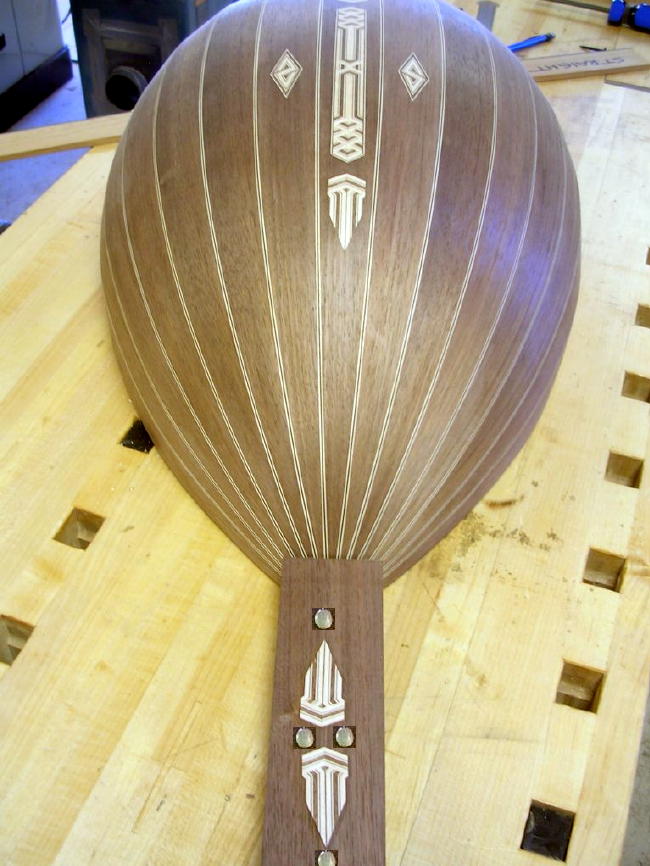
Here's what we've got planned for inlay on the neck. Probably going to inlay some bone circles. Two in between the geometric designs and one
on each tip.
Will look something like this, but bone not Mother of Pearl.
|
|
|
paulO
Oud Junkie
    
Posts: 534
Registered: 9-8-2004
Location: California
Member Is Offline
Mood: Utz
|
|
Jameel..what beautiful work ! Can't wait to hear it !! Mike, this must be pretty exciting for you !!
Take care,
Paul
|
|
|
Cyberquills
Oud Junkie
    
Posts: 182
Registered: 10-12-2006
Location: Western Australia
Member Is Offline
Mood: resonant
|
|
Jameel!
I am more impressed with your skills all the time!! Well done and thank you for sharing.
Cheerio
CQ
|
|
|
Mike
Super Administrator
        
Posts: 1568
Registered: 12-3-2002
Location: California, USA
Member Is Offline
Mood: Happy
|
|
I am beyond excited about this oud Paul. Jameel is done with a lot of the inlay for the soundboard and should be getting started on that part of the
project soon. Keep an eye out for an update.
mike
|
|
|
Mike
Super Administrator
        
Posts: 1568
Registered: 12-3-2002
Location: California, USA
Member Is Offline
Mood: Happy
|
|
We got another update...
I was telling Jameel how when the weekend comes up I am fiending new pictures of his progress on the oud. I know how he works on the oud during the
weekend, and he's been great about getting me pictures of his progress. Told him I feel like a crack addict waiting for my next picture fix.
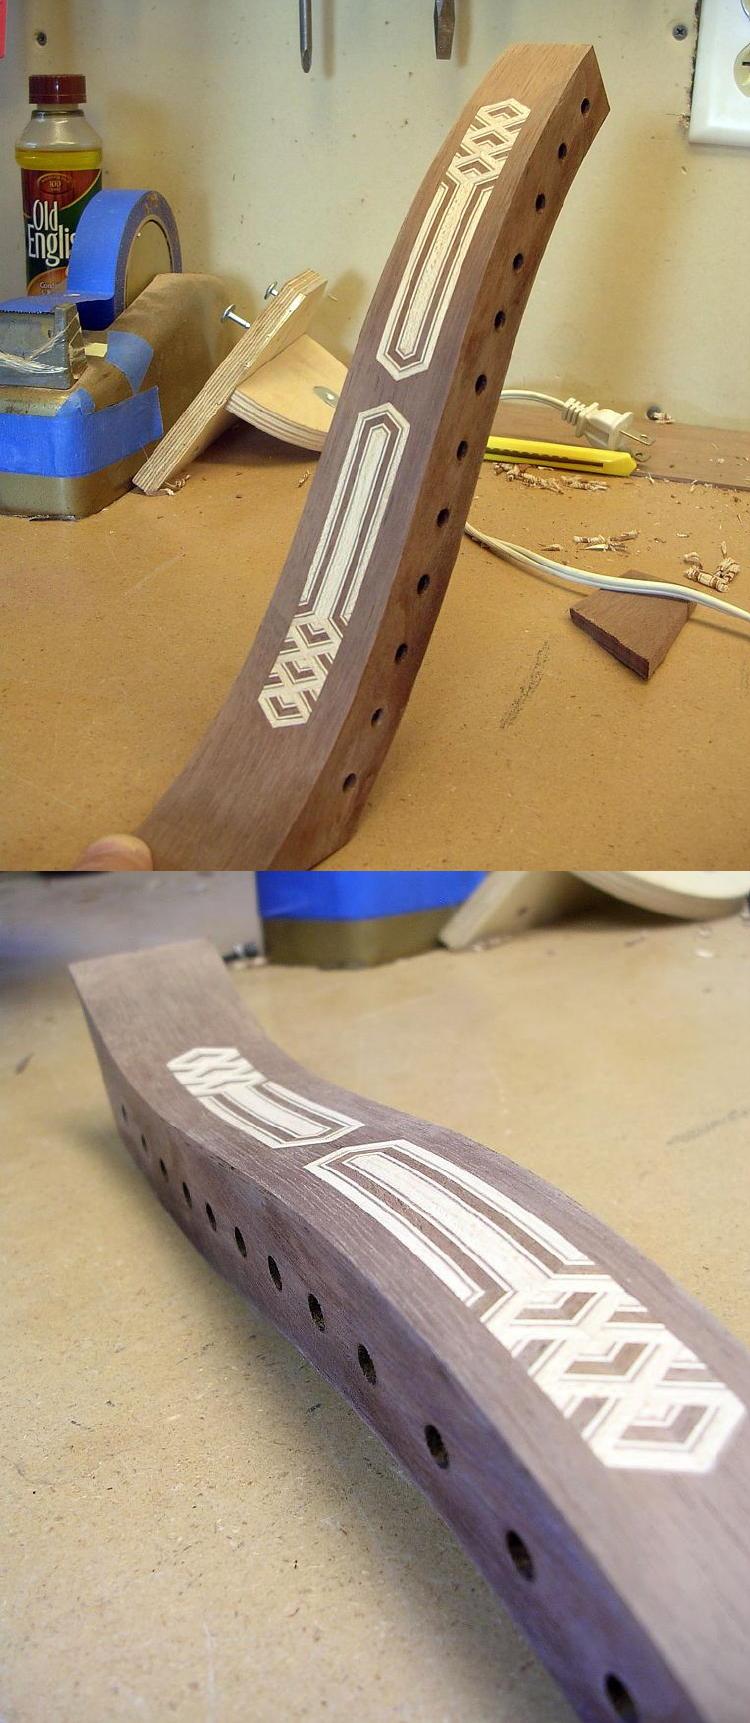
Anywaysss...some progress on the inlays and on the pegbox. Here we go...
Here's the progress on the pegbox.
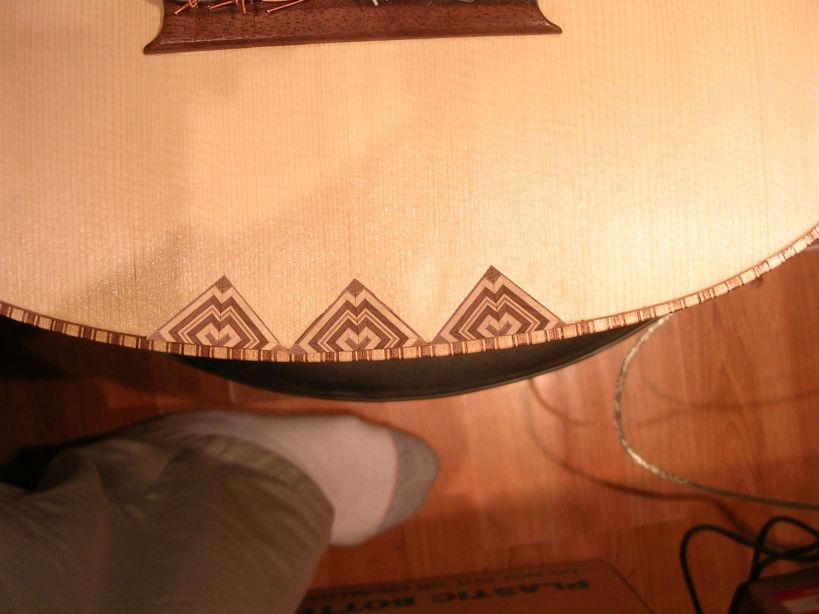
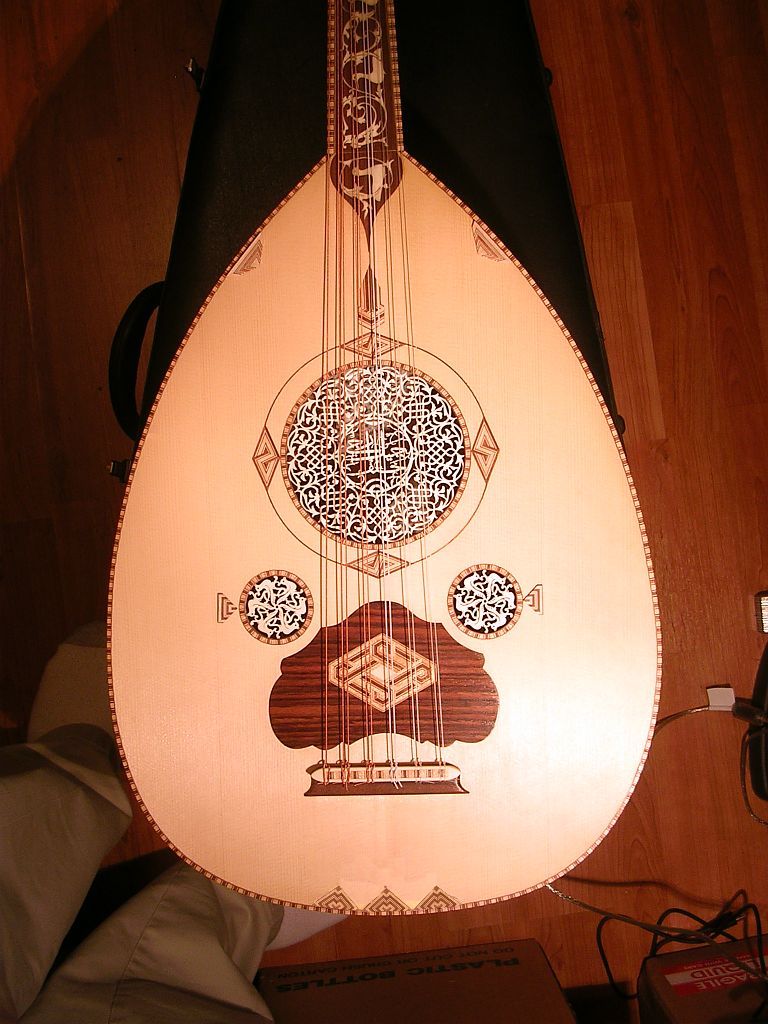
Jameel also got pretty much all of the inlay that's going on the soundboard done too. After multiple pictures sent back and forth, here's what we've
decided to go with. The big decision was what the design for the bottom inlay would be. Anyway, these are just laid on top of his #2 oud, but you get
a pretty good idea about how the oud is going to look like after it is all said and done. Compare it to the first picture in this thread. You can see
the inspiration.
Here is what we decided to go with.
|
|
|
oudplayer
Oud Junkie
    
Posts: 849
Registered: 5-9-2004
Location: new jersey/ Israel
Member Is Offline
Mood: ouds up
|
|
Hey mike
wowiiiiiiiiiiiii this looks sick , its mad hot if you kwnow hat i mean . great work jameel really great work . i love how everythign meshs well it
all blends in >   
    
thx sammy
we are lost camels in the desert and wanna find our way to water and the water is in aden
|
|
|
TruePharaoh21
Oud Junkie
    
Posts: 789
Registered: 3-17-2003
Location: California, USA
Member Is Offline
Mood: Loving the Oud
|
|
I will now do my impression of a 4 year old stuck at home on a summer day.
*ahem ahem* I want to play!
Thank you.
|
|
|
Jarvil
Oud Admirer

Posts: 2
Registered: 4-11-2007
Member Is Offline
Mood: No Mood
|
|
I don't like the inlay on either side of the small sound holes. Out of balance and character with the rest.
|
|
|
Jonathan
Oud Junkie
    
Posts: 1583
Registered: 7-27-2004
Location: Los Angeles
Member Is Offline
Mood: No Mood
|
|
OK, Mike, I'm comparing it with the first picture in the thread--the Nahat. Yeah, I see the inspiration. But, if I am going to be honest, Jameel's
looks a heck of a lot better than the Nahat!
Beautiful, Jameel.
When you were making your first oud, i was amazed at your craftsmanship. Now, I am amazed at your artistry.
Congrats to you both.
|
|
|
mavrothis
Oud Junkie
    
Posts: 1674
Registered: 6-5-2003
Location: NJ/NYC
Member Is Offline
Mood: big band envy
|
|
Absolutely gorgeous Jameel! Thank you for this beautiful piece of art!
Alf Mabrouk Mike!
Take care,
mavrothis
|
|
|
Dr. Oud
Oud Junkie
    
Posts: 1370
Registered: 12-18-2002
Location: Sacramento, CA, USA
Member Is Offline
Mood: better than before
|
|
| Quote: | | ....This dovetail joint is going to be super strong. Much better than the old school dowel joint used in the past... |
No doubt the dovetail is stronger. The thing is, how do you re-set the neck when the body bends up over time from the string pressure? (and it will).
The oud is not built with anywhere the structure of guitars for example, and they still need neck resets. I've gone back to the "old school dowel" for
this reason - it's repairable. How strong does it need to be anyway? Strong enough to withstand the string pressure I say. If you're attempting to
resist accidental damage, you may just transfer the stress elsewhere and the damage may be more difficult to repair. I'M sure the old masters knew
about dovetail joints, I believe they just wanted to keep the neck repairable. - That's my story and I'm stickin' to it!
btw - nice work, Jameel
|
|
|
Jameel
Oud Junkie
    
Posts: 1672
Registered: 12-5-2002
Member Is Offline
Mood: No Mood
|
|
Thanks Jonathan and Mav. Just copying the Nahats here. I wish I had come up with these designs.
Doc O,
You've got a point there. I think both joints have their pluses and minuses, but your comment about repair and resetting is interesting. Have you read
Lundberg's book? I'm really interested in trying his butt-joint and screw method for joining the neck. I know we all frown on using metal in the oud,
but all the old lutes had this same joint, using a large nail instead of a screw. I would venture to guess that lutes from the 16th c back reflect
more historically with the ancient oud than any modern instrument, especially since we don't have any ouds even approaching the antiquity of many
extant lutes. I was imagining resetting an oud neck built to Lundberg's specs. Drop the rose, reach inside and remove the screw, pop the neck joint
loose with a sharp rap from a mallet. Shave a little here and there, reglue and screw, reglue the rose, done. No sawing, no doweling. And most
importantly, almost zero, or zero shortening of the neck. Working from inside, one could also remove the top from the inside out with a hot thin knife
and if done carefully, retain the edge tiles. Speaking of which, what a great argument for lute-style half-binding. Karybian used a similar technique,
only he used a ramped rebate so none of the edge of the soundboard showed (it tapered to 0 by the time it reached the edge). That is really slick. And
it makes removing the top a snap since the soundboard goes all the way out to the edge of the bowl. But doing this perfectly is a huge challenge, and
not one I think I'm up to yet. So Doc, have you ever tried doing a lute-style neck joint with screw?
|
|
|
Dr. Oud
Oud Junkie
    
Posts: 1370
Registered: 12-18-2002
Location: Sacramento, CA, USA
Member Is Offline
Mood: better than before
|
|
I haven't tried a bolt/screw-on neck - yet. but I'm repairing on one now. I haven't srtung it up but have found one problem - the screw alignment gets
in the way when the angle of the nedck is changed, so as it tightenes down the neck it tries to align to the original angle. I think the clearance
hole in the block neesd to be slotted a bit to allow for the new angle, we'll see when I try that. a flat washer should provide enough support across
the slot. No, I haven't read Lundberg.
|
|
|
Ararat66
Oud Junkie
    
Posts: 1025
Registered: 11-14-2005
Location: Portsmouth, UK
Member Is Offline
Mood: mellow yellow
|
|
Hi Jameel
Great work - you could always create a pinned tenon joint (as you see in timber framed buildings). If you need to reset the neck you just need to
knock the pins out after removing the collar between neck and body. I've seen this in a luthiers handbook I have somewhere.
Leon
|
|
|
Fazhu
Oud Admirer

Posts: 7
Registered: 9-10-2007
Member Is Offline
Mood: No Mood
|
|
Jameel, Tommy Coleman here, from MIMF. Since the topic of the neck joint is up, what is the purpose of the neck standoff over the headblock? To
keep the belly and fingerboard on the same plane? Or had you just not planed it down yet?
|
|
|
Fazhu
Oud Admirer

Posts: 7
Registered: 9-10-2007
Member Is Offline
Mood: No Mood
|
|
Jameel, I don't remember which oud project of yours it was, but I remember you talking about mold flats and that your future oud mold would have
flats. Is that the case with this one? If you have a pic of your mold would you post it? Thanks.
|
|
|
Jameel
Oud Junkie
    
Posts: 1672
Registered: 12-5-2002
Member Is Offline
Mood: No Mood
|
|
| Quote: | Originally posted by Ararat66
Hi Jameel
Great work - you could always create a pinned tenon joint (as you see in timber framed buildings). If you need to reset the neck you just need to
knock the pins out after removing the collar between neck and body. I've seen this in a luthiers handbook I have somewhere.
Leon |
That's an interesting idea Leon. I think there are numerous ways of doing it, finding the slickest is the challenge.
| Quote: | Originally posted by Fazhu
Jameel, Tommy Coleman here, from MIMF. Since the topic of the neck joint is up, what is the purpose of the neck standoff over the headblock? To
keep the belly and fingerboard on the same plane? Or had you just not planed it down yet? |
Welcome Tommy. You guessed it, I just hadn't planed it flush yet. I always start with an oversize neck blank to allow for adjustment after the
joining.
| Quote: | Originally posted by Fazhu
Jameel, I don't remember which oud project of yours it was, but I remember you talking about mold flats and that your future oud mold would have
flats. Is that the case with this one? If you have a pic of your mold would you post it? Thanks. |
Check the earlier pages in this thread. There are some pics of the mold. I didn't do the flats. I like the idea of flats, but they seem restrictive. I
mean, if you end up with a rib that is tight to the mould, and a little too narrow, how does the next one meet with it? It doesn't. Moulds with flats
are great for making a very precise bowl, but they don't allow any room for even small error. I'm not that good at bowls yet, so I'll stick to a round
mould, which also has it's disadvatages. I guess I'd have to try one with flats eventually.
|
|
|
Mike
Super Administrator
        
Posts: 1568
Registered: 12-3-2002
Location: California, USA
Member Is Offline
Mood: Happy
|
|
The pegbox is almost done.
Looking good, eh?
|
|
|
Mike
Super Administrator
        
Posts: 1568
Registered: 12-3-2002
Location: California, USA
Member Is Offline
Mood: Happy
|
|
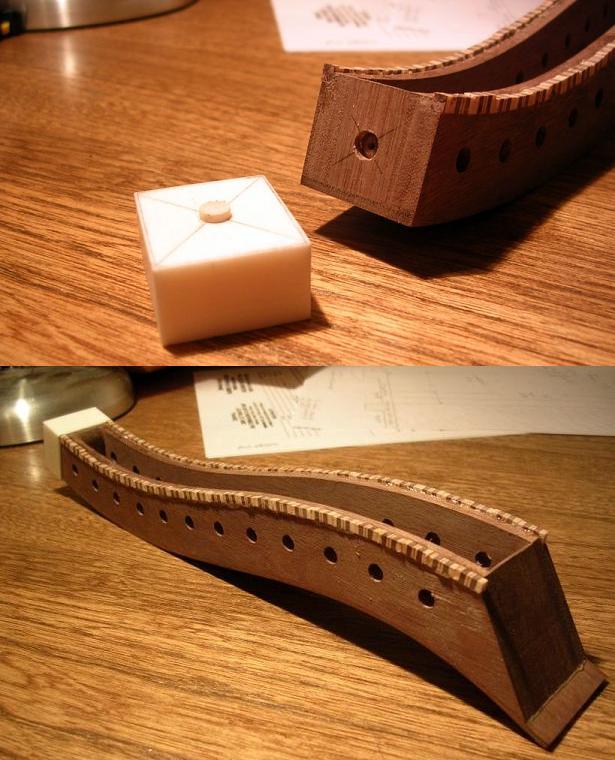
Another pegbox update. I asked Jameelo to make a pyramid tip for the pegbox. Hey, I'm Egyptian! Also, we are gonna do some binding along the top of
the pegbox. Almost done.
|
|
|
SamirCanada
Moderator
     
Posts: 3405
Registered: 6-4-2004
Member Is Offline
|
|
Nice!!!
thats gona look good
|
|
|
TruePharaoh21
Oud Junkie
    
Posts: 789
Registered: 3-17-2003
Location: California, USA
Member Is Offline
Mood: Loving the Oud
|
|
Hey guys,
Jameelo... you know already how much I admire your work, and this continues to grow. This is a piece of art.
I have one question... I'm a bit confused: how is it that the pegbox wasn't completed, but the strings were put onto the oud in that picture up
above?
Mike... you're a lucky man.
Peter
|
|
|
Mike
Super Administrator
        
Posts: 1568
Registered: 12-3-2002
Location: California, USA
Member Is Offline
Mood: Happy
|
|
Hey TP,
Thanks buddy. Yeah, I am pretty lucky. The picture above is Jameel's number 2 oud. The one he brought with him last summer. He just laid the
additional inlays on top to give me an idea of the overall look. Remember, we're going with square inlays around the soundholes.
Take care,
Mike
|
|
|
| Pages:
1
2
3
4
5
..
10 |